SCCM: Uninstall the Skype for Business 2016 client
While preparing an Office 365 ProPlus application package for deployment through SCCM, I found that an existing Skype for Business 2016 installation prevented setup from continuing. The ProPlus package included a new Skype for Business client, so I needed to remove the existing installation first.
I used the following steps to add an uninstall program to the existing SCCM application.
Create lync-uninstall.xml
| |
Save the file with the SCCM application's package content.
Create Microsoft.Skype.for.Business.2016.x86-REMOVE.cmd
| |
Update the application's uninstall program to use the new CMD file.
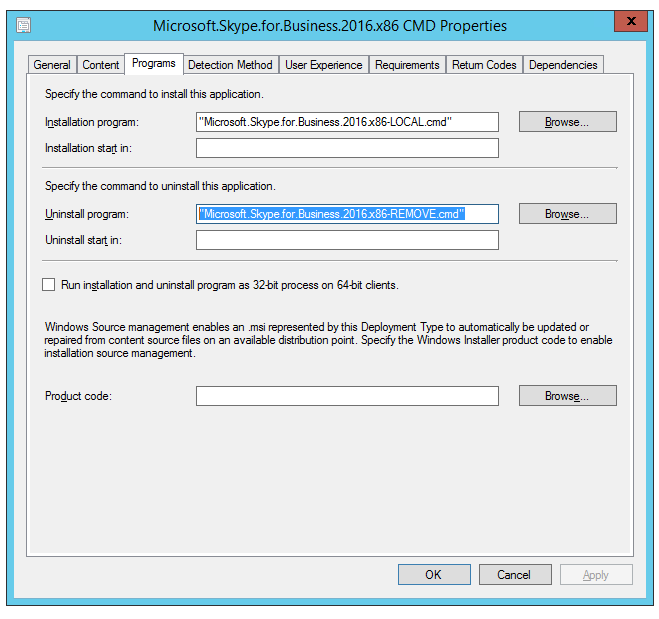
After these files were added to the package source, Update Content needed to be run on the deployment to replicate the changes to all distribution points.
Prevent the client from being installed again
The Skype for Business application was still assigned to the Windows 10 collection. After Skype for Business had been manually uninstalled and Office 365 ProPlus installed, the SCCM agent tried to install Skype for Business again. The agent did not detect the existing installation, and its installation attempt failed.
To prevent another installation attempt, I added a deployment requirement using a global condition that checked for Office 365 ProPlus. The condition used Condition type: Setting, Setting type: Script and Data type: String.
| |
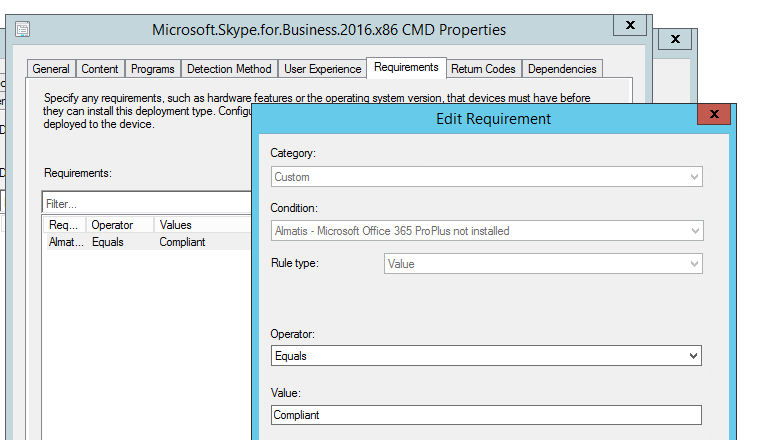
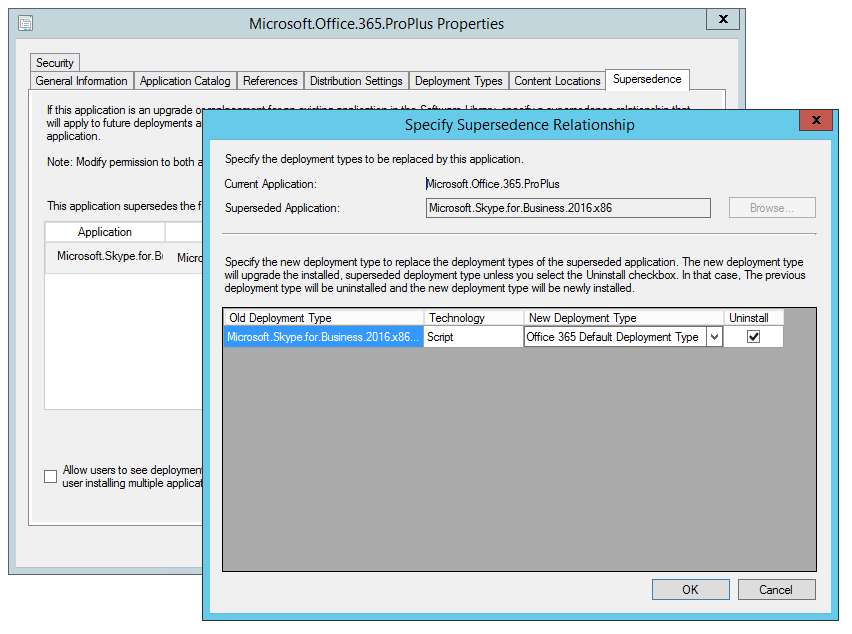
To complete the application lifecycle, I configured the Office 365 ProPlus application to supersede and uninstall the Skype for Business 2016 package.
1 comment
Comments from the original WordPress site, kept read-only.
Hello. I am currently looking to uninstall Skype For Business through SCCM and I came across your article. Question, do i need to currently have an O365 deployment Package created in SCCM? Our Skype for Business is part of our Golden image and so is O365. Just curious in order to follow your article, if I have to create the O365 pacakge with Skype.