After successfully creating, installing and testing Web Gateway on Hyper-V server (see part 1), I started planning towards a global deployment. My deployment is based on multiple sites where Hyper-V hosts are located and having a standardized AD site naming convention. I was able to create a semi-automated PowerShell script to complete my initial steps. SCCM agent is installed on all Hyper-V hosts and I will utilize its capabilities to help me deploying the ISO file and create the VM so I can further complete my migration project.
PowerShell script:
- Script is based on my initial PowerShell code from part 1
- AD site is pulled and used to generate VM name
- Create new VM based on minimal requirements for Web Gateway on Hyper-V
- Network interfaces are configured/created, vlan assigned
- Global network settings are pulled and used to set static MAC address on the network interfaces
- VM started
#Create new Web Gateway Hyper-V appliance
#Get AD site
$ADsite = [System.DirectoryServices.ActiveDirectory.ActiveDirectorySite]::GetComputerSite().Name
Write-Host $ADsite
#Generate name based on AD site
$MWG = $ADsite+"-MWG-1001"
Write-Host $MWG

#Create New VM
$PathOS = "E:\"+$MWG+"\"+$MWG+".vhdx"
New-VM -Name $MWG -Path "E:\" -NewVHDPath $PathOS -NewVHDSizeBytes 80GB -Generation 1 -BootDevice CD
Set-VM -Name $MWG -ProcessorCount 2
Set-VM -Name $MWG -MemoryStartupBytes 16GB
Set-VMDvdDrive -VMName $MWG -Path "E:\Software\mwgappl-7.6.0.1.0-20505.x86_64.iso"

#Configure network interfaces
$MWG | Get-VMNetworkAdapter | Connect-VMNetworkAdapter -SwitchName "vSwitch"
Rename-VMNetworkAdapter -VMName $MWG -Name 'Network Adapter' -NewName 'eth0'
Set-VMNetworkAdapterVlan –VMName $MWG -VMNetworkAdapterName 'eth0' –Access –VlanId 1234
Add-VMNetworkAdapter –VMName $MWG -SwitchName "vSwitch"
Rename-VMNetworkAdapter -VMName $MWG -Name 'Network Adapter' -NewName 'eth1'
Set-VMNetworkAdapterVlan –VMName $MWG -VMNetworkAdapterName 'eth1' –Access –VlanId 4567

#Set static mac address based on current global network settings
$MacAddressMinimum = Get-VMHost
$MacAddressMinimum = $MacAddressMinimum.MacAddressMinimum
$MWGMAC = $MacAddressMinimum.Substring(0,10)
Get-VM -name $MWG | Get-VMNetworkAdapter
Get-VM -name $MWG | Get-VMNetworkAdapter -Name 'eth0' | Set-VMNetworkAdapter -StaticMacAddress $MWGMAC"60"
Get-VM -name $MWG | Get-VMNetworkAdapter -Name 'eth1' | Set-VMNetworkAdapter -StaticMacAddress $MWGMAC"61"
Start-VM $MWG
Script above is used to generate file named Create-NEW-MWG.ps1 and saved on folder where SCCM server can access the share. My next steps are to create all necessary SCCM components to be able to push the deployment to my Hyper-V servers.
SCCM Package
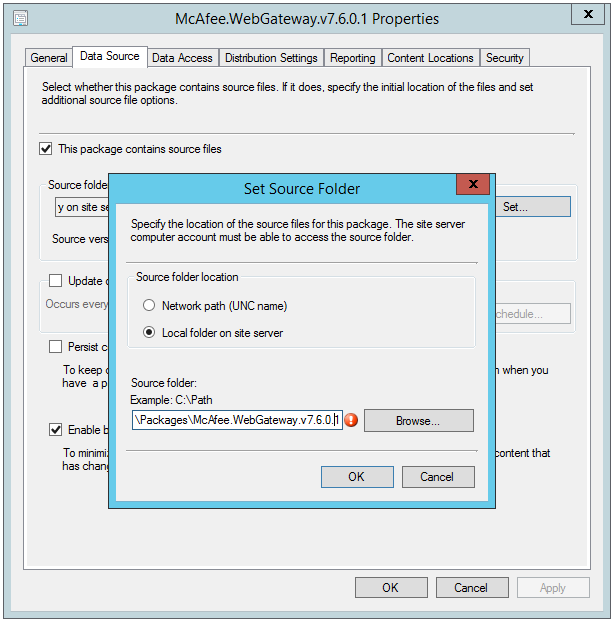
- Create new folder, copy the PowerShell script Create-NEW-MWG.ps1 and ISO file to the server
-
As shown below I have two files

-
Data Source = my folder location where the files are stored

SCCM Task Sequence
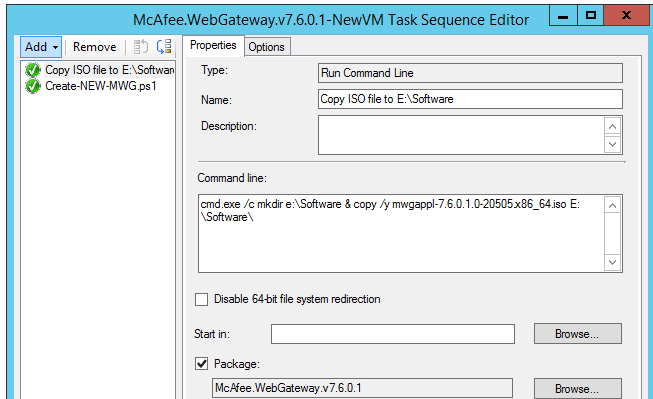
I created new Operating System Deployment Task Sequence for copying the ISO file to a location where I have set my installation source for Web Gateway and run the PowerShell script. Basically only two steps:
-
cmd.exe /c mkdir e:\Software & copy /y mwgappl-7.6.0.1.0-20505.x86_64.iso E:\Software\

-
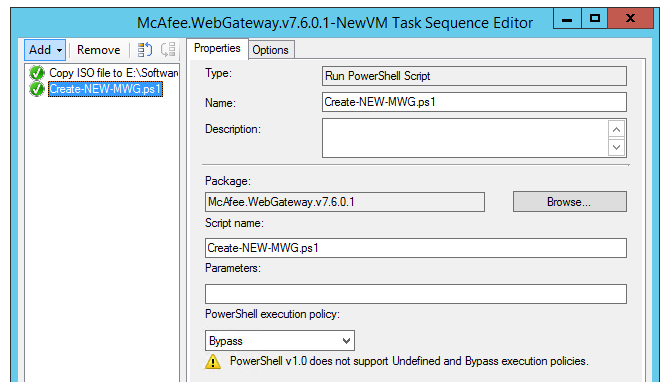
Add PowerShell command with the ps1 script

Package replicated to all remote distribution points, created new collection based on Hyper-V hosts that should receive the script and created new required deployment for running the task sequence.
I have succesfully managed to for running the deployment. All remove VM appliances were generatedthrough SCCM and PowerShell script. With the following script logic and SCCM I could automate my deployment process and re-use the script for future needs.
In my following post I will zoom into the migration and finalize my Web Gateway deployment for Hyper-V infrastructure.


Leave a comment